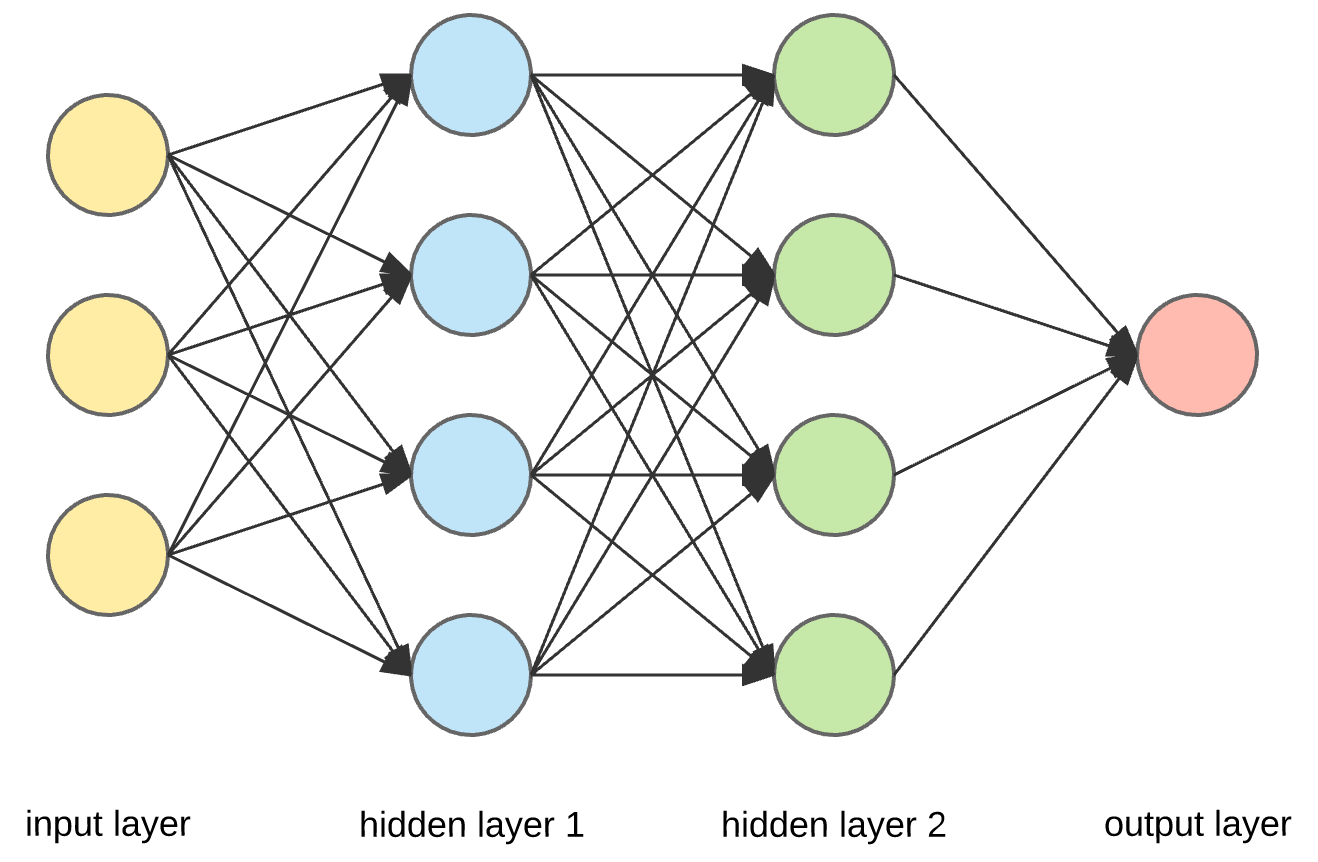
The Backpropagation algorithm:
Calculating the errors:
The detailed intuition of backpropagation to learn the theta is beyond what this blog covers, but you'll get what you need to know to use the algorithm.
First, we will calculate delta(l)(j) : "error" of node j in layer l.
For layer 4, this delta matrix, which, in this case, contains only one node.
\[Delta4 = h - y\] Where h is the output of the neural network.
\[Delta3 = (theta3).T@Delta4 * (a3 * (1-a3))\]
Note here, that we use the operators as in python. Thus, @ is the matrix multiplication operator and * is element-wise multiplication operator. Similarly, for layer 2, we have:
\[Delta2 = (theta2).T@Delta3*(a2*(1-a2))\].
In case you have more layers, the same method can be used to calculate the error for each of the output layer and the hidden layers.
The Backpropagation algorithm:
The algorithm to get the theta matrices for our neural network.
Step 1: Have a training set X and y. Let m be the number of training examples in it.
Step 2:
*set $a1 = X$ // feeding i-th training example into the neural network.
*perform forward propagation, on this data and compute activations for each layer as a2, a3, etc. and h for the last layer.
* Now compute the errors for each layer, thus, if L is the number of layers, calculate $Delta-l= h-y(i)$. And compute Delta-(l-1),.....Delta2.
*set $gamma1 = Delta2.T@a1$, similarly $gamma2 = Delta3.T@a2$ and $gamma3 = Delta4.T@a3$
* $Theta1_gradient = gamma1/m$ $Theta2_gradient = gamma2/m$ $Theta3_gradient = gamma3/m$
* Now apply the usual gradient descent.
The detailed explanation, why this works is beyond the scope of this blog.
The code:
Here is the code that does exactly the same thing:
| def nnCostFunction(self, theta1, theta2, input_layer_size, hidden_layer_size, num_labels, X, y, Lambda): # |
| |
| m = X.shape[0] |
| I = np.eye(num_labels) |
| Y = np.zeros((m, num_labels)) # this is the array for predictions |
| for i in range(m): |
| l = y[i, 0] |
| Y[i, :] = I[l - 1, :] |
| a1 = np.hstack((np.ones((m, 1)), X)) |
| z2 = a1 @ theta1.T |
| temp = self.sigmoid(z2) |
| a2 = np.hstack((np.ones((z2.shape[0], 1)), temp)) |
| h = self.sigmoid(a2 @ theta2.T) |
| # np.sum(Theta1[:,1:]**2) + np.sum(Theta2[:,1:]**2) |
| p = sum(sum(theta1[:, 1:] ** 2)) + sum(sum(theta2[:, 1:] ** 2)) |
| J = (sum(sum((-Y) * np.log(h) - (1 - Y) * np.log(1 - h), 2)) / m) + ((Lambda * p) / (2 * m)) |
| #till now forward propagation had been done. Now, backpropagation. | |
| sigma3 = h - Y |
| sigma2 = (sigma3 @ theta2) * self.sigmoidGradient(np.hstack((np.ones((z2.shape[0], 1)), z2))) |
| sigma2 = sigma2[:, 1:] |
| delta2 = sigma3.T @ a2 |
| delta1 = sigma2.T @ a1 |
| p1 = (Lambda / m) * np.hstack((np.zeros((theta1.shape[0], 1)), theta1[:, 1:])) |
| p2 = (Lambda / m) * np.hstack((np.zeros((theta2.shape[0], 1)), theta2[:, 1:])) |
| Theta_grad1 = (delta1 / m) + p1 |
| Theta_grad2 = (delta2 / m) + p2 |
| return J, Theta_grad1, Theta_grad2 |
The parameter Lambda is used for regularization, and you can pass zero to it. Regularization is a general trick to improve our predictions.
These gradients now can be used to perform gradient descent. As follows,
The gradient descent:
| def gradientDescent(self, X, y, initial_nn_params, alpha, num_iters, Lambda, input_layer_size, hidden_layer_size, |
| num_labels): |
| theta1 = initial_nn_params[:hidden_layer_size * (input_layer_size + 1)].reshape(hidden_layer_size, |
| input_layer_size + 1) |
| theta2 = initial_nn_params[hidden_layer_size * (input_layer_size + 1):].reshape(num_labels, |
| hidden_layer_size + 1) |
| back propagation | m = len(y) |
| J_history = [] |
| for i in range(num_iters): |
| nn_params = np.append(theta1.flatten(), theta2.flatten()) |
| cost, grad1, grad2 = self.nnCostFunction(nn_params, input_layer_size, hidden_layer_size, num_labels, X, y, |
| Lambda) |
| theta1 = theta1 - (alpha * grad1) |
| theta2 = theta2 - (alpha * grad2) |
| J_history.append(cost) |
| return theta1, theta2, J_history |
Again, the Lamda is used for regularization and can be passed as zero. The gradient descent here is the same as that used in Linear Regression and Logistic Regression.
Now, these are the thetas that can be used to predict the output using the concept of the forward propagation:
| def predict(self, theta1, theta2, X): |
| m = X.shape[0] |
| a1 = np.hstack((np.ones((m, 1)), X)) |
| z2 = a1 @ theta1.T |
| temp = self.sigmoid(z2) |
| a2 = np.hstack((np.ones((z2.shape[0], 1)), temp)) |
| a3 = self.sigmoid(a2 @ theta2.T) |
| return np.argmax(a3, axis=1) + 1
|
Note that the sigmoid gradient used in the above code is nothing but a disguised form of something we have already discussed:
|
| def sigmoidGradient(self, z): |
| return self.sigmoid(z) * (1 - self.sigmoid(z)); |
|
You might also want to initialize the thetas randomly, for their use, you implement the corresponding function as follows:
| def randInitializeWeights(self, L_in, L_out): |
| epsilon = (6 ** 1 / 2) / (L_in + L_out) ** 1 / 2 |
| W = np.random.rand(L_out, L_in + 1) * (2 * epsilon) - epsilon |
| return W |
L_in and L_out are the numbers of units in the layer on which theta operates and the layer whose result it produces respectively. All the values in it lie within the range of epsilon to -epsilon.